Storing MP3 Audio Files from the Note Editor
You can use AwesomeTTS to just add or update audio files one-by-one.
This method, along with the card browser method, will store the generated audio files with your Anki collection, inserting [sound] tags into your note fields. These tags are understood natively by all versions of Anki, and once generated can be played back even without AwesomeTTS. If you do not study outside of the desktop version of Anki, the on-the-fly method or the on-demand presets method might be easier.
Instructions
- From the note editor, activate the input field to which you would like to add the audio [sound] tag.
- Click the speaker icon in the toolbar.
- Select your desired service and configure any options.
- Confirm that the input phrase is correct.
- Click “Preview” to confirm that your audio is as you would like it to sound.
- Click “Record” to insert the audio clip in the field.
Hints
- AwesomeTTS will automatically populate the input field of the note editor dialog with whatever was already in the active note field when you opened the dialog. If it was empty, AwesomeTTS will try to populate the input field with whatever is in the system clipboard. The options you set on the Text tab of the configuration screen will apply to this.
- Mass removal of audio can be done via the card browser later if you decide you do not like the audio you have added to a set of notes.
- The default keyboard shortcut to launch AwesomeTTS from the note editor dialog is Ctrl+T (or Cmd+T on Mac OS X), which overrides the default Anki shortcut key for LaTeX. If you want to restore the LaTeX shortcut key, you can change this in AwesomeTTS’s window configuration.
Screenshots
 Note editor AwesomeTTS button
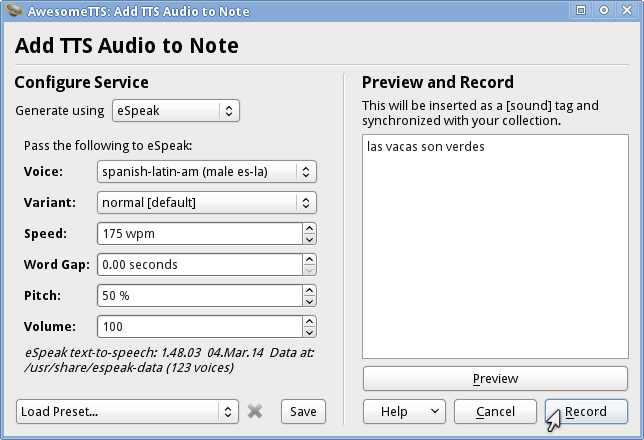 Recorder dialog
![Note seen with a new [sound] tag in one of the input fields](/usage.editor.yield.png) Note afterward
Note afterward